
My father is a marine engineer and shipwright of many years experience and serviced my engine the first few years of having the boat before he encouraged me to have a go myself. Being a man of poor memory and many excel spreadsheets and much documentation, I made sure I created notes around the process. Below is a walkthrough of the service of our reliable and hardy Yanmar 2GM20. Note, this comes with no warranty and is based on my likely flawed scribblings.
For parts and spares, I always use the epic French Marine over in Brightlingsea who have cracking customer service and a great stock of both parts and knowledge.
Click below to download the workshop manual for the 2GM20 (and indeed all GM and HM engines), which includes the correct torque settings for all the bolts.
Yanmar GM and HM workshop manual
Parts required
- Socket set
- Oil Filter remover
- Watering can
- Antifreeze
- Oil 2 Litres 15/40 (Mineral oil of API CI-4 or API CF4 standard), see here for an interesting write up. I use Shell Rimula (as did my father who was a marine engineer and a shipwright).
- PELA type oil sump pump
- Oil jug for pouring
- Fuel Filter and O ring
- C Spanner
- Oil filter
- WD40
- 2 X Engine Anodes
Steps to winterise
Oil replacement
- Remove oil using the sump pump. Put the hose of the sump pump down the well where the dip stick comes out from (quite fiddly indeed) on the stb side of the engine.

Yanmar 2GM20 sump pump tube
- Place a tray and lots (and I mean lots!) of paper-towel under the oil filter on the port side of the engine. Replace the Oil Filter using the Oil Filter remover. Smear the seal on the new oil filter with oil from the old filter, then put the new oil filter on as tightly as can be achieved BY HAND.

Yanmar 2GM20 Oil Filter
- Fill with the 2 Litres of Oil, check the dip stick. It should be slightly over filled as it has to refill the oil filter once the engine runs.
Run Antifreeze through the engine to protect it from freezing
- Make sure the engine sea cocks are off.
- Take the top off of the water strainer.

Yanmar 2GM20 Water Strainer
- Steadily pour a mix of 50% antifreeze and 50% water into the top of the strainer whilst running the engine until antifreeze comes out of the exhaust. This will only be a few minutes. It helps to have two of you do this, one in the cockpit to start and run the engine, then shut it off, and one down below doing the pouring!
Fuel
- Turn off fuel if fuel valve present.
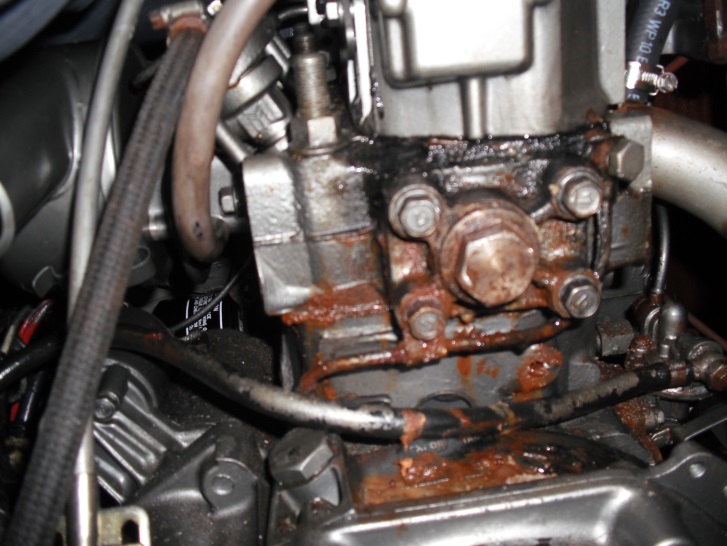
- Drop the engine fuel filter body off with C Spanner.

Yanmar 2GM20 Fuel Filter
- Take the filter out of its casing, being careful to catch any diesel that will escape as you extract the filter from the housing. You may need to pry the filter out with a screwdriver delicately to get it out.
- Gently push the new fuel filter into place.
- Reattach the fuel filter housing.
- Turn on fuel if fuel valve present.
- Slacken the bleed screw at the top of the fuel filter.

Yanmar 2GM20 fuel filter bleed screw
-
- Pump the fuel pump on the Stb side of the engine behind the fuel filter until fuel comes out of the bleed screw. This is quite hard to find, and requires quite a few pushes (and make sure you push it far enough else it will not draw the fuel!).
- Slacken the injection pump bleed screw.
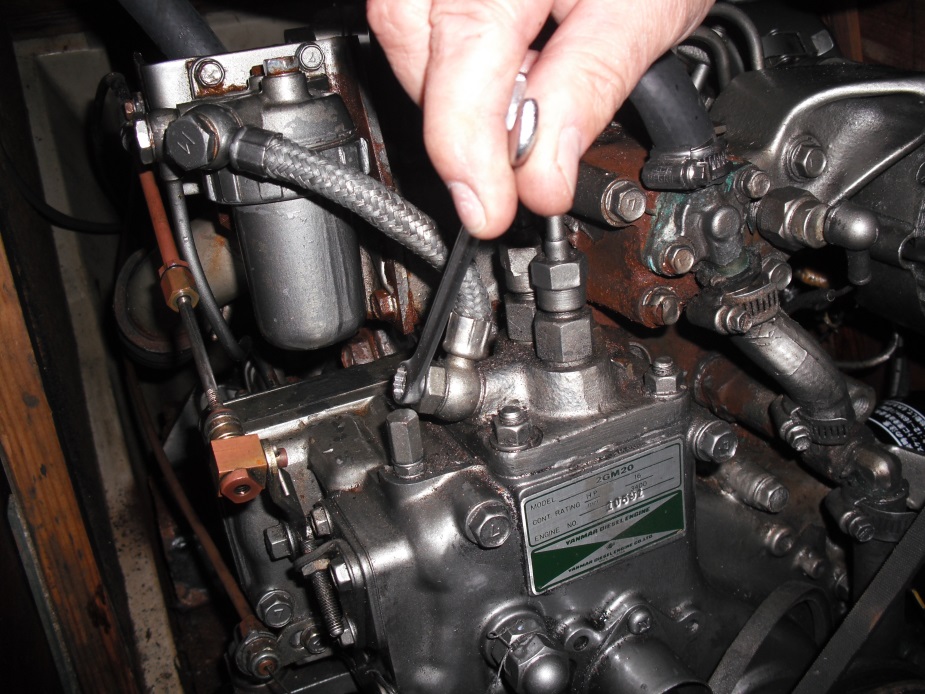
Yanmar 2GM20 injector bleed screw
-
- Pump some more until the fuel comes out of this bleed screw too. Tighten strait away to disallow fuel to drain away.
Impeller removal (to stop it setting in shape over winter)
-
- Remove the two bolts holding the water pump pully on.
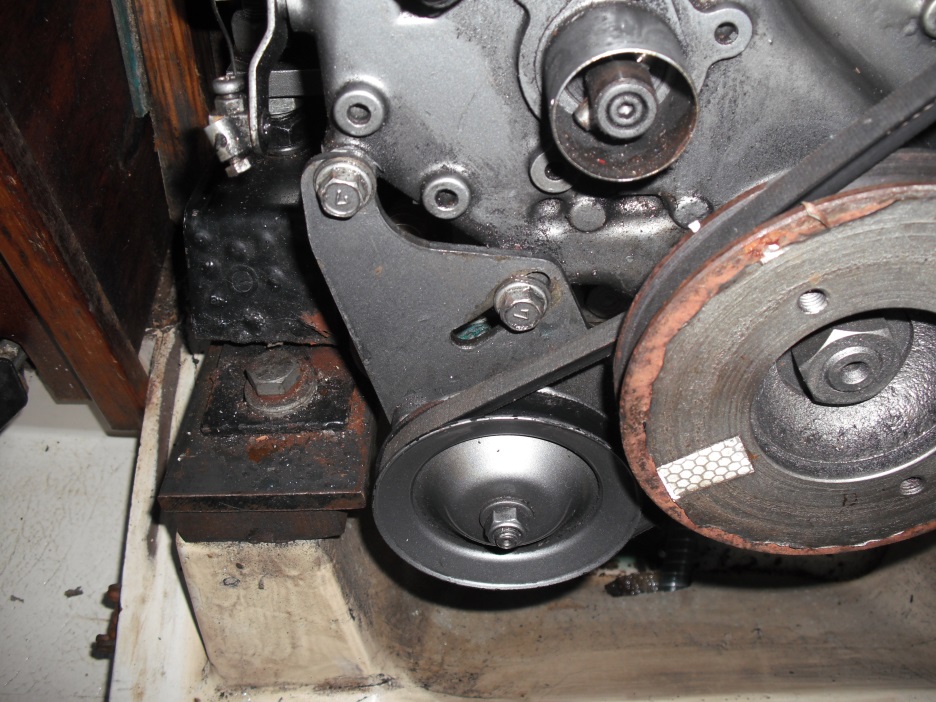
Yanmar 2GM20 water pump pivit
- Remove screws on the back of the casing and remove the impeller (put a screwdriver either side and lever it out gently, making sure not to damage the casing). Be careful with the nuts as they are very small and delicate and a new impeller housing is eye wateringly expensive!

Yanmar 2GM20 impeller housing
- Put the whole assembly back together loosely, until the next season, when reverse the above to put the impeller back in again (put it in so that it turns anti clockwise as you look at it!). Be VERY careful not to cross thread the bolts, note two are shorter than the others. Re-tension the belt by putting a long screw driver between the impeller housing and the engine and levering the pully out to the desired tension. Ensure the belt is on the pully!
Exhaust Elbow
- These Yanmars are notorious for their exhaust elbows disintegrating, so take it off, and check it fully! PBO published a cracking write up on this process here.
- Be very careful taking out the three M8 bolts holding the elbow on! I sheered mine off trying to access mine. Apply heat and plusgas first and go very carefully indeed.
Engine anodes
- Check the two anodes and replace if necessary. One is on the back of the engine, one is on the Stb side (marked as zinc). These are both removed using a whopping number 24 spanner, and a spanner is what I’d go for, with plenty of leverage, every day over a socket.
- Do not apply any copper grease or such to the threads as that may insulate the anodes from the engine. These are dry fit.

2GM20 anodes

Yanmar 2GM20 stb engine anode (head)
Yanmar 2GM20 back engine anode (block)

Yanmar 2GM20 anode post removal
- Spray the whole engine lightly with WD40, concentrating on the electrical components.
- Put some paper towel up the exhaust to stop cold icy air entering through the exhaust.
Job done!
If this has been helpful and you want to show your gratitude, please feel free to buy me a coffee.

Interesting and easy to follow … thanks … the only thing that stands between me and the open seas is getting to know my 2gm20 a litle better 🙂
Thanks for your kind words – I use it as much as a reference for myself too. Each year when I come to service the engine I always doubt my memory of the operation so print it out, and proceed to get the instructions all oily :). Our 2GM20 has been such a cracking engine and has looked after us through all sorts of conditions – if looked after it won’t let you down. What boat have you got?
Great Site. Thanks so much. I am a new owner of an Older Boat and just now getting into the Yanmar 2G maintenance mode. This site helps so much. Thanks Sir !
Hi There, great post! That actual picture of the first anode entitled “Yanmar 2GM20 stb engine anode (head)” . There’s a high pressure oil line, mine popped a pinhole leak due to corrosion. Is that a high pressure oil return line do you know? where does the other end of that line connect to?? Just getting started with gathering information for this process! Thanks appreciate any knowledge
Thanks for your kind words. As for that pipe, I’m not sure. You could hunt for an answer in here, however, I would take a photo of it and email/call Brian at French Marine. They are very helpful, patient, and frankly awesome people to deal with. Brian would be able to tell you without a photo more than likely and supply the replacement part in a jiffy. Good luck, let me know how you get on!
I’m also a new owner of an old boat with a Yanmar 2GM. When running the antifreeze through would the thermostat be closed and not allow the antifreeze to replace all the water in the engine? Does the thermostat have to be temporarily removed?
Well, I would have thought so. I asked that very same question to French Marine, and they said they never bothered removing the Thermostat at all and they had never had any trouble. I never have removed it, and I have never had any trouble either even during all that snow and cold we had (I do keep a bar heater in the boat mind you).
I’m a new owner of a 2GM. After some research on forums the most frequent advice was to remove the thermostat or run the engine until it warmed up. Easier when on the hard to remove it. Also allowed for an inspection of it and it has subsequently been replaced. However I doubt if the previous owner ever worried about it and the engine in this regard appears fine?
Hello, we also have an old boat with a yammar 2gm20 engine. We need to check the 2 anodes amongst other things. Do you know what size socket is required for removing the holding bolts ?
Hello Alan, Apologies its taken me some time to respond! I’ll actually be doing this job at the weekend so I’ll check then and update the article above.
I have just bought a boat with a 2GM20 and although the previous owner said it had been serviced on a regular basis ? I was keen to fit new anodes and filters just in case. Your help has been unbelievable, I don’t need to be a mechanic to follow your instructions, brilliant thank you.
Congratulations on getting it serviced! Its very useful to know where everything else is whilst you are at sea too. Glad it was helpful!
From what I understand is that the 2gm20F does not have or need zinc anodes. Please confirm. Thank you
Very nice tutorial – thank you! When you remove the impeller doesn’t the antifreeze liquid then run out?
Hello there, Thanks for the comment, apologies for the time to reply. Yes, a lot of it does (have paper towel handy…!), but it means there is no water left anywhere else in the engine where it can freeze and then thaw causing damage.